How to Remove an Alternator From a 1995 Ford f150
As an Amazon Associate we earn from qualifying purchases.

Before you remove the alternator from a 1995 Ford F150, start by disconnecting the negative battery cable using a 5/16-inch wrench and set it aside. This step is crucial to avoid any electrical shorts or shocks while working on the charging system.
Next, loosen the tensioner and slip the serpentine belt off the alternator. Then, carefully disconnect the wiring connected to the alternator.
Once the mounting bolts are removed, the alternator should come free without much resistance, provided nothing has been causing it to stick. Paying attention to these details can prevent the job from turning into a more complicated repair.
Key Takeaways
- Disconnect the negative battery cable first with a 5/16-inch wrench to prevent electrical shorts.
- Remove the air intake ducting and any snorkel or resonator blocking access to the alternator.
- Release serpentine belt tension with a ratchet or breaker bar, then slip the belt off the alternator pulley.
- Unplug the alternator connector and remove the main charging wire after noting their locations.
- Remove the mounting bolts, support the alternator, and lift it straight out without twisting or forcing.
Tools You’ll Need

Before you start, gather the tools you’ll need so the alternator removal goes smoothly and safely. You’ll want a ratchet, metric and SAE socket set, combination wrenches, a breaker bar, and a small pry bar.
A serpentine belt tool or long-handled wrench helps you release belt tension. Keep a flashlight, gloves, and safety glasses nearby for visibility and protection.
A multimeter supports basic car battery basics and confirms the charging system overview before you touch components. Use a battery terminal brush and penetrating oil if fasteners are corroded.
Have a tray or magnetic parts holder ready to keep bolts organized. If your truck has accessories or brackets in the way, a 3/8-inch extension set can save time and prevent rounded fasteners during alternator removal.
Disconnect the Battery
Disconnect the negative battery cable first, since the alternator and its wiring stay live until the circuit is isolated. Use a 5/16-inch wrench, loosen the terminal nut, and lift the cable free.
Move it aside so it can’t spring back and touch the post. This step prevents shorts, sparks, and a damaged charging circuit. Keep your hands clear of jewelry and tools that can bridge the terminals.
If a random idea or unrelated topic crosses your mind, ignore it and stay focused on power isolation.
| Step | Action | Result |
|---|---|---|
| 1 | Loosen negative clamp | Circuit opens |
| 2 | Remove cable | Power is isolated |
| 3 | Secure cable | Accidental contact is prevented |
Verify the battery is disconnected before continuing.
Access the Alternator
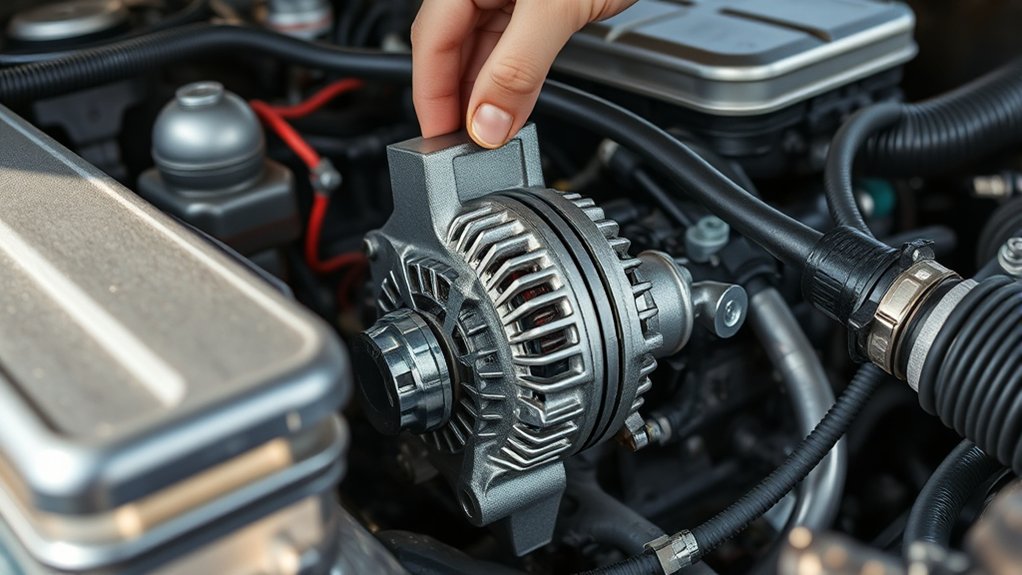
Remove the air intake ducting and any snorkel or resonator that blocks access to the alternator. Loosen the belt tension so you can slip the drive belt off the alternator pulley, then clear any brackets or wiring that crowd the mounting area.
With the front of the engine opened up, you’ll have enough room to remove the alternator fasteners.
Remove Air Intake
Now, clear the air intake assembly so you can reach the alternator on the 1995 Ford F-150. Open the hood and identify the air intake duct, filter housing, and attached hoses in the engine bay.
Loosen the clamps securing the duct with a screwdriver or nut driver, then disconnect any vacuum lines or sensors clipped to the intake. Lift the intake tube away and set it aside where it won’t be damaged.
If the air cleaner box blocks access, remove its fasteners and move the assembly out of the way as a unit. Keep track of each clamp and screw so you can reinstall them correctly.
With the air intake removed, you’ll have the clearance needed to view the alternator mounting area and continue the job safely.
Loosen Belt Tension
Loosen the belt tension on the alternator drive belt so you can move the alternator and create enough slack for removal. Use the correct wrench on the tensioner or pivot hardware and back the belt off just enough to relieve load on the pulley.
Keep your grip steady so the belt doesn’t snap back and damage adjacent parts. Once tension drops, check the belt for cracks, glazing, or fraying, since wear here affects noise reduction and can hurt fuel economy.
You don’t need to remove the belt completely unless access requires it. A properly relaxed belt lets you rotate the alternator slightly and prepare it for the next step. Work carefully, because excessive force can bend brackets or stress the tensioner.
Clear Mounting Space
Clear a bit of working room around the alternator so you can reach the mounting bolts and electrical connections without forcing anything. Move aside the air intake tube, vacuum lines, and any loose harness clips that block access.
If a bracket or shroud sits in front of the unit, remove only the fasteners you need and keep them organized.
| Item | Action | Result |
|---|---|---|
| Intake tube | Unbolt and shift | Opens top access |
| Wire clips | Release carefully | Prevents harness strain |
| Brackets | Remove as needed | Exposes mount points |
You’re now set to inspect the alternator body, connectors, and pivot ear. This step also helps with maintenance budgeting because you avoid broken parts. Even diesel engines reward the same careful clearance.
Loosen the Serpentine Belt
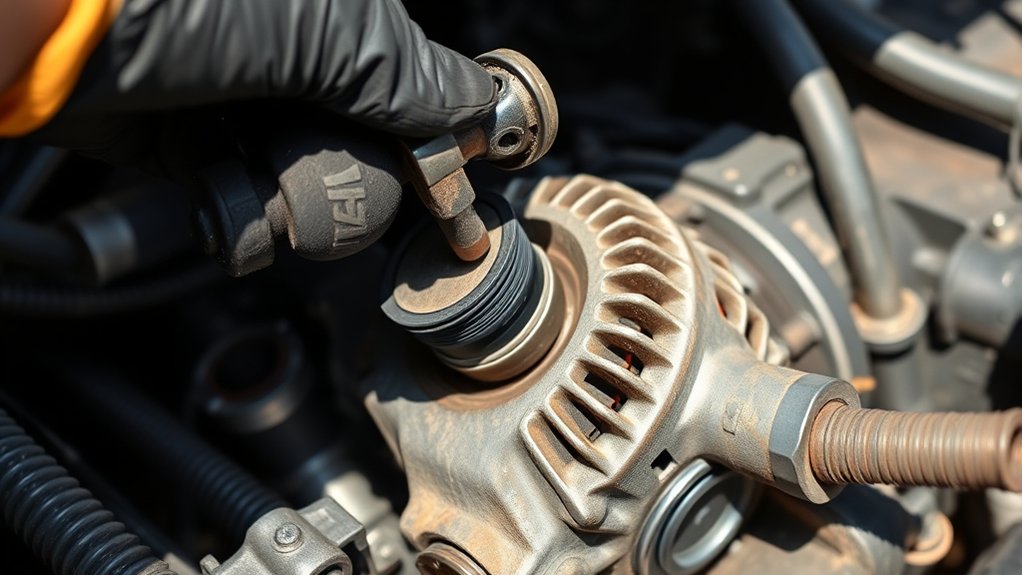
Locate the belt tensioner on the serpentine belt path and identify the square-drive or wrench point used to move it. Use the correct tool to rotate the tensioner and relieve belt tension.
Once the belt slackens, slip it off the alternator pulley and keep it clear of the pulleys.
Locate Belt Tensioner
Before you can remove the alternator, you’ll need to release tension on the serpentine belt by finding the belt tensioner and turning it with the proper tool. Disconnect the battery first for battery safety, then inspect the front of the engine bay. You’ll usually spot the tensioner near the belt path, with a square drive or bolt head for finding tools.
Use a ratchet or breaker bar that fits securely. Keep the belt routing in view before you move anything.
- Trace the belt around each pulley
- Identify the spring-loaded tensioner arm
- Match the tool to the drive size
- Check for clear swing room
- Note belt direction for reassembly
Once located, verify solid tool engagement before you proceed.
Release Belt Tension
Insert your ratchet or breaker bar into the tensioner and rotate it to relieve pressure on the serpentine belt. Keep steady control so the arm doesn’t snap back and damage components. While you hold the tension off, slide the belt off the alternator pulley first, then ease it away from the remaining pulleys in the correct routing order.
On vintage trucks, belt access can be tight, so use a flashlight and confirm the belt path before you move it. Don’t remove the belt completely unless you need extra clearance for car care tasks.
Once the belt is free of the alternator, let the tensioner return slowly to its stop. Inspect the belt for cracks, glazing, or fraying before reinstalling it or replacing it later.
Disconnect the Alternator Wires
With the battery disconnected, you can unplug the alternator’s electrical connections to free it from the charging circuit. First, note wire locations so you can reconnect them correctly later. Ignore any irrelevant topic or unrelated concept that doesn’t affect the harness.
Then:
- lift the rubber boot off the output stud
- remove the retaining nut with a small wrench
- slide the charge wire off the stud
- depress the connector tab on the regulator plug
- pull the plug straight out, not sideways
Inspect each terminal for corrosion, heat damage, or loose fit. If you see green buildup, clean it before reassembly. Keep the wires clear of the alternator case and nearby brackets so they won’t snag while you work. Once both connections are free, tuck them aside safely.
Remove the Alternator Mounting Bolts
Next, remove the alternator mounting bolts to free the unit from the bracket. Use the correct socket and ratchet to break each bolt loose, then back them out by hand so you don’t strip the threads. On this Ford, one bolt may also serve as the pivot, so support the alternator with your free hand while you work.
If corrosion resists, apply penetrating oil and wait a few minutes instead of forcing the fastener. Keep the bolts organized by length and location; that prevents confusion during reassembly. Ignore subtopic detours and stick to the hardware in front of you.
These two word discussion ideas matter because belt tension and bracket alignment depend on clean removal. Once both bolts are out, the alternator will be ready for the next step.
Lift the Alternator Out
Once the mounting bolts are out, support the alternator with both hands and lift it straight up and out of the bracket. Keep the unit level so you don’t stress the wiring or strike nearby components. If it feels hung up, pause and verify that no clip, harness, or brace still holds it.
Use controlled upward force; don’t pry against the housing.
- Hold the alternator at the frame
- Clear the bracket without twisting
- Guide wires away from sharp edges
- Watch for remaining attachment points
- Set the unit on a clean bench
This lift-out step is simple when you stay methodical. Interior lighting and tire rotation aren’t relevant here, so focus on clearance, balance, and safe removal.
Check the Replacement Alternator
Before you install the replacement alternator, compare it to the old one and verify the pulley style, mounting ears, electrical connector, and plug orientation match your 1995 F-150. Check the case for cracks, bent tabs, or damaged threads, and make sure the belt groove lines up with the original pulley offset.
If the unit came pre-tested, review the alternator testing results so you know its output met spec before shipping. Spin the pulley by hand; it should turn smoothly without grinding or wobble. Inspect the regulator connector pins for corrosion or deformation.
Confirm warranty considerations now, including return limits and core-charge requirements, so you’re covered if the part fails after installation. Verify amperage rating matches your truck’s electrical load.
Common Removal Problems
If the alternator won’t come free, inspect the belt tensioner, pivot bolts, and rear electrical connections first. You may need to break corrosion with penetrant and a soft pry bar. Verify you’ve loosened all bracket fasteners; one hidden bolt can lock the housing.
Watch for these issues:
- Seized lower pivot bolt
- Stubborn rear charge wire nut
- Misrouted belt blocking removal
- Interference from A/C lines
- Ground cable still attached
Keep the battery disconnected, even if your truck has keyless ignition add-ons. Check tire pressure only if you must move the vehicle, but don’t use that as a distraction.
If the alternator shifts but won’t clear the bracket, rotate it slowly and reassess cable slack. Work methodically, and don’t force the case or crack the mounting ears.
Reinstall the Alternator and Belt
Bolt the alternator back into its bracket and tighten the mounting hardware to the specified torque.
Route the drive belt over the pulleys in the correct path, then make sure it sits fully in each groove. Adjust the belt tension to the proper deflection so the belt won’t slip or overload the bearings.
Reinstall Alternator
Set the alternator back into its bracket and thread the mounting bolts in by hand to avoid cross-threading. Tighten the hardware evenly, then reconnect the electrical plugs and main charging wire with clean, secure contact.
This step supports alternator maintenance and protects battery safety by preventing loose connections and accidental shorts.
- Verify the case sits flush
- Confirm terminals match their posts
- Inspect the connector locks
- Check for pinched wiring
- Snug fasteners to spec
After everything is seated, compare the belt path with the pulley faces and make sure the unit doesn’t shift under light hand pressure. Recheck each connection before you start the engine.
A secure installation helps the charging system operate correctly and reduces the chance of vibration-related failure during service.
Route Drive Belt
With the alternator bolted in place, route the drive belt back over the pulleys using the factory belt path. Make sure the ribs seat fully in each groove and the belt tracks straight across the accessories.
Before you start the engine, check electrical safety by confirming the battery cable is still disconnected and the alternator wiring is clear of the belt path.
| Check | Result |
|---|---|
| Belt sits in pulley grooves | Proper |
| Wiring clears moving parts | Safe |
| Pulley alignment looks even | Correct |
If the belt twists or rides high, stop and reposition it now. Keep the belt centered on every pulley, and inspect the tensioner contact points for correct placement.
Once everything lines up, you’re ready for the next step.
Set Belt Tension
Reinstall the alternator fully, then set belt tension by moving the alternator outward until the belt deflects to the proper spec under firm thumb pressure. Tighten the pivot and adjustment bolts while you hold position, then recheck deflection after each fastener.
Use these safety steps and diy guidance to avoid slip or overload:
- Inspect belt ribs for cracks
- Verify pulley alignment
- Keep fingers clear of pinch points
- Tighten bolts evenly
- Recheck tension after engine start
If the belt squeals, loosen and adjust again. If it feels too tight, back off slightly; over-tension shortens bearing life. After startup, watch for wobble and listen for noise. Shut the engine off, confirm bolt torque, and retest.
Frequently Asked Questions
What Symptoms Indicate the Alternator Is Failing?
You’ll notice dim lights, battery warning, hard starting, and voltage drops. You may hear whining or see flickering gauges.
Leather upholstery and tire rotation don’t matter here; test charging voltage to confirm alternator failure.
How Much Does a Replacement Alternator Cost?
You’ll usually pay $80 to $200 for a replacement alternator, depending on output and brand. Check money saving tips, compare remanufactured units, and avoid buying unrelated tools you won’t need for installation.
Can I Drive With a Bad Alternator Temporarily?
No, you shouldn’t drive with a bad alternator; it’s a ticking clock. You risk a dead battery, stalled engine, and unsafe shutdowns.
For driving safety, do electrical troubleshooting now and limit trips.
Which Alternator Fits a 1995 Ford F150 Engine Size?
You need the alternator that matches your engine size and mounting style; verify replacement compatibility by VIN. Bring installation tools, then match amperage, pulley, and connector type for your 1995 F-150.
How Do I Test the Alternator After Installation?
You’ll test voltage first, like a heartbeat check: start the engine, measure 13.8–14.8 volts at the battery, then do battery load testing.
If readings dip, inspect wiring, belt tension, and connections.
Conclusion
Now you’ve got the alternator out of your 1995 Ford F-150, and the job is nearly done. Inspect the mounting points, wiring, and pulleys for corrosion or damage before you install the replacement.
Make sure the new alternator matches the old one, then reinstall it, route the serpentine belt, and reconnect the battery.
If everything lines up, your truck should be back in action faster than a telegram. Removing and replacing the alternator from a 1995 Ford F-150 is a straightforward process when done carefully.