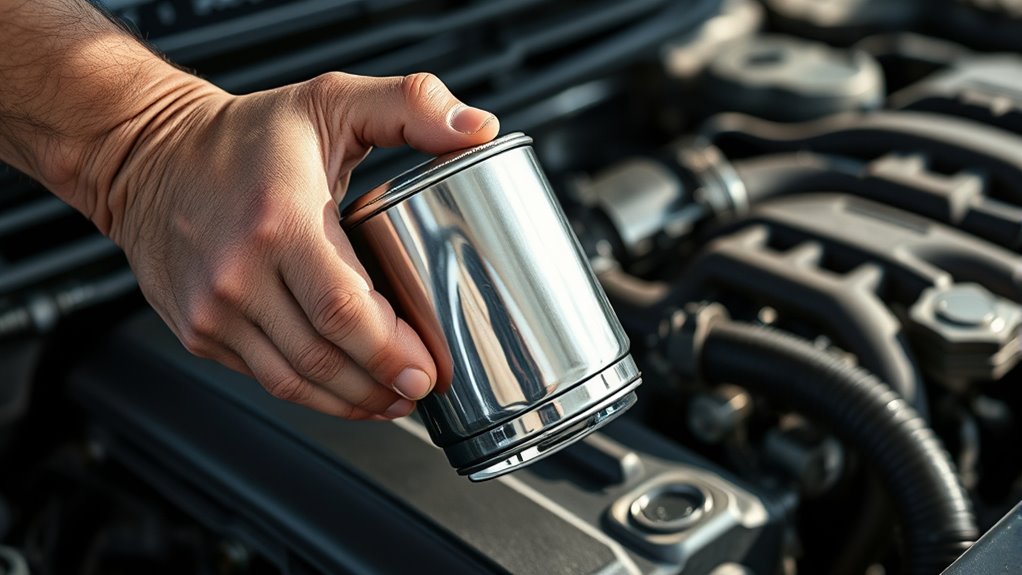
Tightening your oil filter correctly is crucial to ensure a proper seal and avoid leaks.
You should tighten your new oil filter by hand, turning it clockwise until the rubber gasket contacts the mounting surface.
Then, give it an extra three-quarters to one full turn.
Avoid over-tightening to prevent crushing the gasket or causing leaks, and never use tools unless specified by the manufacturer.
Make sure to lubricate the gasket with clean oil before installation for a smooth seal.
There’s more to know about preparing your vehicle and avoiding common mistakes for a perfect filter fit.
Key Takeaways
- Turn the oil filter clockwise by hand until the gasket contacts the mounting surface for a secure seal.
- After gasket contact, tighten the filter an additional three-quarters to one full turn by hand.
- Lubricate the filter’s rubber gasket with clean oil before installation for a smoother seal and easier removal.
- Avoid using tools to tighten, preventing gasket crushing or thread damage.
- Always check the manufacturer’s instructions for specific torque values or tightening guidelines.
How Tight Should You Tighten a New Oil Filter?
When you install a new oil filter, you should tighten it just enough to create a secure seal without overdoing it. Typically, this means turning the filter by hand until the gasket contacts the mounting surface, then giving it an additional three-quarters to one full turn.
This approach guarantees the filter is snug and leak-free without risking damage to the gasket or filter housing. Using tools to overtighten can crush the gasket or strip threads, leading to leaks or costly repairs.
If you’re ever unsure, check the manufacturer’s instructions, as some filters require specific torque values. Remember, hand-tightening is usually sufficient, and over-tightening doesn’t improve performance—it just creates problems.
Keep it firm but gentle to maintain proper function.
How Do You Prepare Your Vehicle for Oil Filter Replacement?
Before you start, make sure you gather all the necessary tools like a wrench, oil filter wrench, and a drain pan.
Don’t forget to let your engine cool down completely to avoid burns.
Preparing properly sets you up for a smooth oil filter replacement.
Gather Necessary Tools
You’ll need a few essential tools to prepare your vehicle for an oil filter replacement. Having the right equipment on hand makes the job smoother and safer. Here’s a quick checklist of what you should gather before you start:
- Oil filter wrench: to loosen and tighten the filter without damaging it
- Drain pan: to catch old oil and prevent spills
- Socket set or wrench: for removing drain plugs and other bolts
- Clean rags or paper towels: to wipe away oil residue and keep the area clean
- New oil filter and replacement oil: to guarantee your engine runs smoothly after the change
Ensure Engine Cool Down
Having gathered all the necessary tools, it’s important to let your engine cool down completely.
Working on a hot engine can cause burns and make handling components difficult.
Wait at least 30 minutes after turning off your vehicle to guarantee the oil and engine parts have cooled sufficiently.
This also prevents oil from spraying out under pressure when you remove the filter.
If you’re unsure, carefully touch the engine block or oil filter housing to check for heat before proceeding.
Taking this simple safety step protects you from injury and helps maintain the integrity of the oil system during replacement.
Once cooled, you can confidently move on to loosening and tightening the oil filter without risking damage or personal harm.
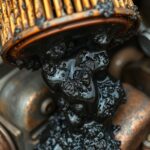
How Do You Remove the Old Oil Filter Safely?
Before removing the old oil filter, make sure you have the right tools and a clean workspace ready.
Drain the oil properly to avoid spills and burns.
Then, use the correct technique to loosen and remove the filter safely without damaging any parts.
Prepare Tools And Workspace
A well-organized workspace and the right tools make removing the old oil filter safer and more efficient. Before you start, clear your work area to avoid accidents and gather everything you’ll need. This preparation helps prevent spills and streamlines the process.
Make sure you have:
- A sturdy oil filter wrench suited to your filter size
- Protective gloves to keep your hands clean and safe
- A drain pan to catch any leaking oil
- Rags or paper towels for quick cleanup
- Safety glasses to protect your eyes from splashes
Arrange these items close by, so you don’t waste time searching mid-task. With your workspace tidy and tools ready, you’re set to remove the old oil filter safely and smoothly.
Drain Oil Properly
Once you’ve prepared your workspace, you’ll need to drain the oil properly to avoid spills and burns. Start by placing a drain pan under the oil drain plug.
Carefully loosen the plug with a wrench, letting the oil flow out completely. Be patient; it can take several minutes. Once drained, securely reinstall the drain plug to prevent leaks.
Next, position the drain pan beneath the oil filter to catch any residual oil when you remove it. This step helps keep your workspace clean and protects the environment.
Always wear gloves to shield your skin from hot oil. Properly disposing of used oil and filters is essential; check local regulations for recycling or disposal sites.
Draining oil carefully sets the stage for safely removing and tightening your new oil filter.
Use Correct Removal Technique
With the oil drained and your workspace protected, you can focus on removing the old oil filter safely.
Start by locating the filter and ensuring the engine is cool to avoid burns. Use a proper oil filter wrench to get a good grip without damaging the filter.
Loosen it slowly to prevent oil spills. As you remove it, keep a drain pan underneath to catch any residual oil.
Keep these tips in mind:
Wear gloves to protect your hands from hot oil and grime.
Turn the filter counterclockwise to loosen.
Use a rag to wipe any oil residue from the mounting surface.
Avoid using excessive force to prevent damage.
Dispose of the old filter according to local regulations.
This approach keeps the process clean and safe.
What Tools and Techniques Help Tighten Oil Filters Properly?
Several essential tools and techniques can help you tighten oil filters correctly to prevent leaks and guarantee a secure fit.
First, use an oil filter wrench for a firm grip, especially on tight or slippery filters. Before installing, lubricate the filter’s rubber gasket with clean oil to ascertain a smooth seal.
Tighten the filter by hand, turning it clockwise until the gasket contacts the mounting surface. Then give it an additional 3/4 to 1 full turn. Avoid using excessive force to prevent damage.
| Tool | Purpose | Technique |
|---|---|---|
| Oil Filter Wrench | Grip & tighten | Use for stubborn filters |
| Clean Oil | Lubricate Gasket | Apply thin layer on gasket |
| Hand | Final Tightening | Turn 3/4 to 1 turn after contact |
What Common Mistakes Should You Avoid When Tightening Oil Filters?
Though tightening an oil filter seems straightforward, many people make mistakes that lead to leaks or damage. To avoid common pitfalls, keep these points in mind:
Don’t overtighten; it can crush the gasket or damage the filter housing.
Avoid under-tightening, which causes oil leaks and engine damage.
Never reuse an old gasket; it can create a poor seal.
Clean the mounting surface before installation to prevent dirt from compromising the seal.
Apply a thin layer of oil on the gasket for a smoother fit and easier removal later.
How Can You Check for Leaks After Installing the Oil Filter?
After you’ve properly tightened the oil filter while avoiding common mistakes, the next step is to check for leaks to confirm a secure seal.
Start by wiping off any excess oil around the filter and the mounting area. Then, start your engine and let it run for a few minutes.
Watch closely for any signs of oil dripping or seeping near the filter. You can also place a clean piece of cardboard or paper under the oil filter to catch any drips.
If you notice leaks, immediately turn off the engine and tighten the filter a bit more by hand. Don’t over-tighten.
Recheck after a short run until no leaks appear. This confirms your oil filter is properly sealed and prevents potential engine damage.
Frequently Asked Questions
Can I Reuse an Old Oil Filter Gasket?
You shouldn’t reuse an old oil filter gasket because it can become brittle or damaged, leading to leaks.
Always replace the gasket with a new one to guarantee a proper seal and avoid engine problems down the road.
How Often Should I Replace My Oil Filter?
You should replace your oil filter every time you change your oil, usually every 3,000 to 7,500 miles, depending on your vehicle and oil type.
Check your owner’s manual for specific recommendations.
What Type of Oil Filter Is Best for My Car?
Choosing the best oil filter depends on your car’s make, model, and driving habits.
You’ll want a high-quality, brand-recommended filter that balances efficiency and durability, not just the cheapest option that might save money but risk engine health.
Does Tightening the Oil Filter Affect Engine Performance?
Yes, tightening the oil filter properly guarantees a good seal, preventing leaks and maintaining oil pressure.
If it’s too loose or too tight, you risk leaks or damage, which can negatively affect your engine’s performance.
Can Overtightening Cause Engine Damage?
Overtightening your oil filter is like squeezing a ripe fruit too hard. It can bruise the engine.
You risk stripping threads or cracking the filter housing, leading to leaks and potential engine damage. Handle with care.
Conclusion
Tightening your oil filter takes a touch of technique and a ton of care.
By preparing properly, removing the old filter safely, and tightening with the right tools, you’ll prevent pesky problems like leaks or damage.
Don’t forget to double-check your work to dodge drips and disasters.
With practice and patience, you’ll master the method, making maintenance more manageable and keeping your engine running smoothly and safely.
In conclusion, the key steps to successfully tightening your oil filter are preparation, safe removal, proper tightening, and thorough checks.