To change your oil filter without a special tool, first make sure your car is on a flat surface with the engine cool.
Drain the engine oil safely into a container.
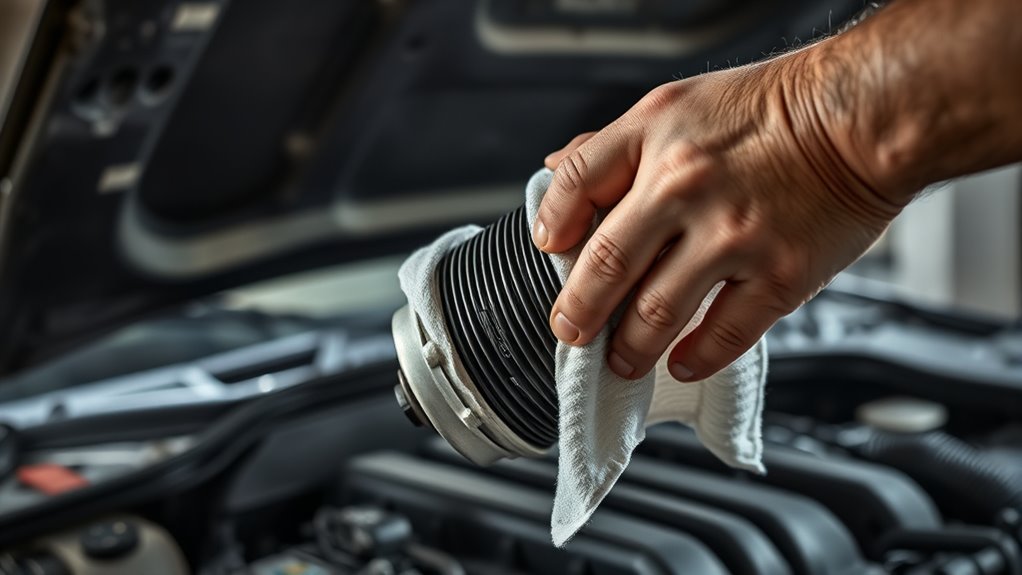
Grip the filter by hand or use a rubber glove or thick band for better leverage to turn it counterclockwise.
Remove the old filter carefully to prevent spills, clean the mounting surface, and hand-tighten the new filter with oil on its seal.
Proper disposal follows.
You’ll find more helpful tips for common challenges ahead.
Key Takeaways
- Use a thick rubber glove or wrap a rubber band around the filter for extra grip when turning it counterclockwise by hand.
- Wedge a spoon or butter knife carefully between the filter and mounting surface to pry the filter loose without damaging the engine.
- Heat a towel with hot water, wrap it around the filter to expand the metal, and then try loosening the filter by hand.
- Have a container ready under the filter to catch residual oil and protect the floor with newspapers or plastic sheets to prevent spills.
- After removing the old filter, clean the mounting surface and apply fresh oil to the new filter’s rubber seal before hand-tightening it.
Prepare Your Car for an Oil Filter Change Without Tools
Before you begin changing the oil filter, make sure your car is parked on a flat, stable surface and the engine is cool to avoid burns.
Next, pop open the hood and locate the oil filter, usually a round, metal canister. You won’t need tools just yet, but it helps to have a container ready to catch any oil drips.
Protect your hands with gloves or a cloth since oil can be messy and hot spots may remain.
Also, spread newspapers or a plastic sheet under your car to catch any spills.
Take a moment to check your vehicle’s manual for the exact oil filter location and specifications.
Preparing properly sets you up for a smoother, safer oil filter change without tools.
Drain Engine Oil Safely Before Oil Filter Removal
Before removing the oil filter, make sure your vehicle is securely positioned to prevent any accidents.
You’ll want to use the proper drainage method to safely collect the old engine oil.
Taking these steps helps keep your workspace clean and protects you from spills.
Prepare Vehicle Securely
Start by securely positioning your vehicle on a flat surface and engaging the parking brake to prevent any movement. This guarantees your safety while working underneath the car.
Next, place wheel chocks behind the rear wheels to further stabilize the vehicle. If your car has a manual transmission, leave it in gear; for automatics, keep it in park.
Before draining the oil, allow the engine to cool down to avoid burns from hot oil or components. Wear gloves to protect your hands and keep a rag nearby for any spills.
Have a container ready to catch the draining oil. Taking these precautions will help you safely prepare your vehicle and make the oil filter removal process smooth and secure.
Use Proper Drainage Method
Although it might seem straightforward, draining your engine oil properly is essential to avoid spills and guarantee a clean workspace.
Before removing the oil filter, you need to safely drain the old oil to prevent mess and contamination. Here’s how you can do it effectively:
- Place a suitable container under the oil pan to catch the draining oil.
- Loosen the drain plug carefully, letting the oil flow out completely without rushing.
- Once drained, securely tighten the drain plug to avoid leaks before moving on to the oil filter removal.
Remove a Loose Oil Filter by Hand
Grip the oil filter firmly and turn it counterclockwise to loosen it by hand. If the filter is loose enough, your grip alone should start to unscrew it.
Use a clean rag or gloves to improve your hold and protect your hands from oil. Keep turning steadily without forcing it, as excessive force might damage the filter housing.
Once it begins to move, continue turning until you can remove it completely by hand. Be prepared for some residual oil to spill, so have a container or rag underneath.
After removal, inspect the filter mounting surface for any leftover gasket material to prevent leaks when installing the new filter. Removing a loose filter by hand is straightforward and avoids the need for tools.
Loosen a Stuck Oil Filter Using Household Items
If your oil filter won’t budge by hand, don’t worry. You can use common household items to help loosen it. Start by increasing your grip and leverage with these simple tricks:
- Rubber Glove or Band: Wrap a rubber glove or a thick rubber band around the filter to improve your grip and twist it loose.
- Spoon or Butter Knife: Carefully wedge a spoon or butter knife between the filter and the mounting surface to gently pry it loose. Be careful not to damage the filter or seal.
- Hot Towel: Heat a towel with hot water, wring it out, and wrap it around the filter. The warmth can help expand the metal slightly, making it easier to turn.
Use these methods carefully to avoid injury or damage.
Clean the Oil Filter Mounting Surface for a Proper Seal
Before installing a new oil filter, you’ll want to thoroughly clean the mounting surface to guarantee a proper seal. Dirt, old oil, and gasket remnants can cause leaks or poor performance. Use a clean rag or paper towel with a bit of oil to wipe the surface gently. Avoid using sharp tools that might damage the metal.
| Step | Tool Needed | Tip |
|---|---|---|
| Inspect surface | Flashlight | Look for old gasket material |
| Wipe clean | Rag or paper towel | Use light oil for cleaning |
| Check for damage | Visual inspection | Replace if scratched or dented |
Taking these steps guarantees your new filter seals perfectly and prevents leaks.
Install a New Oil Filter Without a Special Tool
Make sure you pick an oil filter that matches your vehicle’s specifications for a proper fit.
You don’t need a special tool to install it; just use your hands to screw it on gently but securely.
Remember to apply a bit of fresh oil to the filter’s rubber seal to create a tight, leak-free connection.
Choosing Compatible Oil Filters
Choosing the right oil filter guarantees your engine runs smoothly and avoids leaks. When selecting a compatible oil filter, you want to match the filter to your car’s make and model to confirm a proper fit and function. Here’s how to pick the right one:
- Check your owner’s manual. It lists the exact oil filter specifications you need.
- Use the vehicle identification number (VIN). Many auto parts stores can find the right filter by entering your VIN.
- Look for certified filters. Choose filters that meet industry standards like API or SAE to confirm quality.
Manual Installation Techniques
You can install a new oil filter manually with just your hands and a few basic steps, no special tools required. First, apply a thin layer of clean oil to the rubber gasket on the new filter. This helps create a tight seal and prevents leaks.
Next, screw the filter onto the engine’s filter mount by hand, turning it clockwise. Tighten it until the gasket contacts the base, then give it an additional three-quarters to one full turn to secure it. Avoid over-tightening, which can damage the gasket.
| Step | Action | Tip |
|---|---|---|
| 1 | Lubricate gasket with clean oil | Guarantees proper sealing |
| 2 | Hand-screw filter clockwise | Prevents cross-threading |
| 3 | Tighten ¾ to 1 turn after contact | Avoid over-tightening |
How to Tighten Your Oil Filter Just Right
Although it might seem simple, tightening your oil filter just right is vital to prevent leaks without damaging the seal. Over-tightening can crush the gasket, while under-tightening risks oil leaks. Here’s how to get it right:
- Hand-Tighten First: Screw the filter on until the gasket contacts the mounting surface. Stop turning once you feel resistance.
- Give It a Quarter Turn: After contact, tighten the filter by about 3/4 of a turn using your hand. This guarantees a snug fit without overdoing it.
- Check for Proper Fit: The filter should feel firm but not forced. If it spins easily, tighten a bit more; if it feels stuck, don’t push harder.
Dispose of Old Oil and Filters Responsibly
Properly disposing of old oil and filters prevents environmental damage and complies with local regulations.
After draining the oil and removing the filter, pour the used oil into a clean, sealable container.
Never dump oil down drains, on the ground, or in the trash.
For the used filter, place it in a plastic bag or container to avoid leaks.
Locate a nearby recycling center, auto parts store, or service station that accepts used oil and filters.
Many communities offer hazardous waste disposal events or dedicated drop-off points.
By taking these steps, you help protect water sources and soil from contamination.
Always check your local guidelines to verify you follow proper disposal methods, keeping both your neighborhood and the environment safe.
Troubleshoot Common Problems When Changing an Oil Filter Without Tools
After responsibly disposing of old oil and filters, the next step is to tackle the oil filter replacement itself. Changing an oil filter without tools can be tricky, but you can overcome common problems with a few simple tricks.
- Stuck Filter: If the filter won’t budge, use a rubber glove or a thick cloth for better grip. You can also gently tap around the filter with a wrench handle to loosen it.
- Oil Spills: Keep a drip pan and rags nearby to catch any residual oil escaping when removing the filter.
- Cross-Threading: When installing the new filter, screw it on by hand to avoid cross-threading. Tighten it snugly but don’t overdo it.
These tips will help you change the filter smoothly without special tools.
Frequently Asked Questions
How Often Should I Change My Oil Filter?
You should change your oil filter every time you change your oil, typically every 3,000 to 7,500 miles depending on your vehicle and oil type.
Check your owner’s manual for the best interval for you.
Can I Reuse an Old Oil Filter?
Would you want to risk engine damage?
You shouldn’t reuse an old oil filter because it’s clogged with dirt and debris.
Always replace it to keep your engine running smoothly and avoid costly repairs.
What Type of Oil Is Best for My Car?
You should use the oil grade and type recommended in your car’s owner manual.
Usually, synthetic oils offer better protection and performance.
But always check the specs and climate suitability before choosing the best oil for your car.
How Do I Know if My Oil Filter Is Compatible?
You’ll want to check your car’s manual or manufacturer’s website to verify compatibility.
Matching the filter’s size and specifications quietly guarantees it fits perfectly, keeping your engine running smoothly without unexpected surprises.
What Are Signs of a Failing Oil Filter?
You’ll notice engine noises, decreased performance, dirty exhaust, or oil leaks.
Your oil pressure warning light might come on. If your oil looks dirty quickly, your filter’s probably failing and needs replacing soon to avoid damage.
Conclusion
Changing your oil filter without special tools is like sailing a small boat through tricky waters—you might face some resistance, but with patience and the right moves, you’ll reach calm seas.
By preparing well, using everyday items, and taking care with each step, you’ll keep your engine running smoothly.
Remember, every successful change is a small victory on your journey to car care confidence.
Keep at it, and soon it’ll feel like second nature.
In conclusion, changing oil filter without tool can be done effectively with the right approach.