To change your oil and oil filter, start by gathering essential tools like a wrench, oil filter wrench, and a drain pan.
Park your vehicle on a flat surface and ensure it is lifted safely. Allow the engine to cool completely before proceeding to avoid burns.
Next, drain the old oil by carefully removing the drain plug.
Once the old oil has drained completely, unscrew the old oil filter and replace it with a new one, making sure to apply a bit of oil to the new gasket for a good seal.
After replacing the filter, add the correct amount of new oil to the engine.
Tighten all components securely and check for any leaks around the oil filter and drain plug.
Finally, remember to properly dispose of the used oil and oil filters at a recycling center.
Ready to explore the full step-by-step process?
Key Takeaways
- Park the car on a flat surface, engage the parking brake, and let the engine cool before starting the oil change.
- Drain old oil by removing the drain plug carefully, allowing complete drainage, then securely reinstall the plug.
- Remove the old oil filter using an oil filter wrench, lubricate the new filter gasket, and install it hand-tight.
- Add the correct amount and type of new oil through the filler cap using a funnel, then replace the cap securely.
- Dispose of used oil and filters properly by taking them to a recycling or hazardous waste facility.
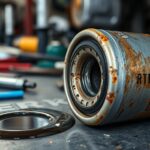
Tools You Need for an Oil Change
To change your oil effectively, you’ll need a few essential tools.
First, grab a wrench or socket set to remove the drain plug. You’ll also need an oil filter wrench to loosen the old filter without damaging it.
Don’t forget a drain pan to catch the used oil; a large, flat container works best to avoid spills.
Have some funnel handy to pour new oil cleanly into the engine.
Additionally, keep a few rags or paper towels nearby to wipe off drips and clean your hands.
Finally, prepare a new oil filter and the right type and amount of fresh oil specified for your car.
Having these tools ready guarantees a smooth, efficient oil change.
How to Prepare Your Car Safely for an Oil Change
Before you start, make certain your car is parked on a flat surface and the parking brake is engaged to keep it secure.
Next, gather all the tools you’ll need so you don’t have to stop midway. Taking these steps helps guarantee your oil change goes smoothly and safely.
Secure Vehicle Positioning
Start by parking your car on a flat, stable surface to prevent any unwanted movement during the oil change. Engage the parking brake firmly to keep the vehicle from rolling.
If you’re working on a slight incline or need to raise the car, use sturdy wheel chocks behind the tires opposite to the side you’re lifting. This adds an extra layer of security.
When lifting the car, use a reliable jack and always support it with jack stands rated for your vehicle’s weight. Never rely solely on the jack, as it can fail unexpectedly.
Position the jack stands under the manufacturer’s recommended lift points to avoid damage. Double-check that the car is steady before you slide underneath. Taking these steps guarantees your safety throughout the oil change process.
Gather Necessary Tools
Once your vehicle is safely secured, you’ll want to gather all the tools and materials needed for the oil change. Start with a new oil filter and the correct type and amount of motor oil specified in your owner’s manual.
You’ll also need a wrench or socket set to remove the drain plug, an oil filter wrench to take off the old filter, and a drain pan to catch the used oil. Have clean rags or paper towels handy for spills and gloves to protect your hands.
A funnel will help you pour new oil without making a mess. Finally, keep a jack and jack stands or ramps nearby if you need extra clearance under your vehicle. Having everything ready will make the oil change smoother and safer.
How to Drain Old Engine Oil Properly
Now that your car is ready, gather the tools you’ll need and position a container under the drain plug.
Carefully loosen and remove the drain plug to let the old oil flow out completely.
Remember to collect the used oil safely and take it to a proper disposal or recycling center.
Prepare Vehicle and Tools
Gathering the right tools and positioning your vehicle correctly sets the foundation for draining old engine oil safely and efficiently.
First, make certain your car is on a level surface and the engine is cool to avoid burns.
Next, gather these essential tools:
- A wrench or socket set to fit the drain plug.
- An oil drain pan to catch the old oil.
- Protective gloves and rags to keep your hands clean and manage spills.
Additionally, you may want to use jack stands or ramps if you need extra clearance.
Double-check that you have fresh oil and a new filter ready for the next steps.
Taking these preparatory actions guarantees you won’t face interruptions once you start draining the oil.
Locate and Remove Drain Plug
Before you begin, make sure the engine is completely cool to prevent burns when you remove the drain plug.
Locate the oil drain plug underneath your vehicle; it’s usually a large bolt on the oil pan at the bottom of the engine. Use a flashlight if needed to spot it clearly.
Position your drain pan directly beneath the plug to catch the oil. Fit the correct-sized wrench or socket onto the drain plug and turn it counterclockwise.
Loosen it carefully; oil may start to drip as you unscrew it completely. Once loose, remove the plug by hand, keeping your fingers clear of the flowing oil.
Allow the oil to drain fully into the pan before proceeding. Keep the drain plug nearby; you’ll need to reinstall it later.
Safely Dispose Used Oil
Once you’ve removed the drain plug and let the old oil flow into the pan, it’s important to handle the used oil responsibly.
Improper disposal can harm the environment and violate local laws. Follow these steps to safely dispose of your used oil:
- Transfer the used oil into a clean, sealed container with a secure lid to prevent spills.
- Locate a nearby recycling center, auto shop, or hazardous waste facility that accepts used motor oil.
- Deliver the container to the facility, ensuring you follow any specific guidelines they provide.
Never pour used oil down drains, on the ground, or in the trash. By disposing of your oil correctly, you protect the environment and keep your community safe.
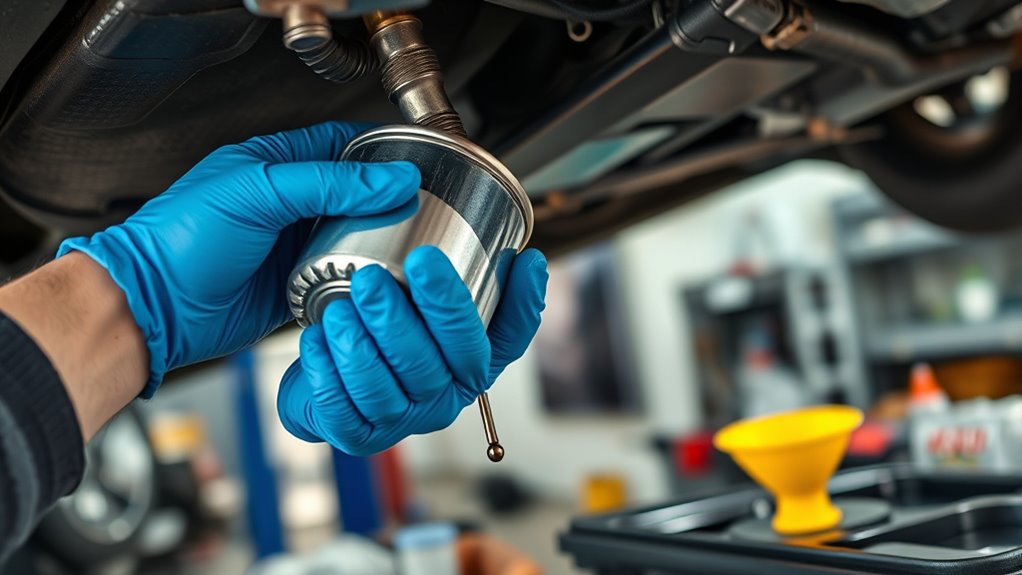
Removing and Replacing the Oil Filter Correctly
Although it might seem straightforward, removing and replacing the oil filter requires careful attention to avoid spills and guarantee a proper seal.
First, position a drain pan beneath the filter to catch any dripping oil. Use an oil filter wrench to loosen it by turning counterclockwise.
Once loose, carefully unscrew it by hand, keeping it upright to minimize mess. Before installing the new filter, apply a thin layer of fresh oil to its rubber gasket.
This helps create a good seal and makes future removal easier. Screw the new filter on by hand until the gasket touches the mounting surface.
Then tighten it an additional three-quarters of a turn; avoid over-tightening. Finally, wipe any spilled oil and check for leaks after running the engine briefly.
Choosing and Adding the Right Engine Oil
How do you know which engine oil is right for your vehicle? Start by checking your owner’s manual; it provides the exact oil viscosity and specifications recommended by the manufacturer.
Next, consider these steps:
- Select the Correct Viscosity: Use the oil grade (e.g., 5W-30) specified for your climate and engine type.
- Choose the Oil Type: Decide between conventional, synthetic, or synthetic blend based on performance needs and budget.
- Look for Certification: Confirm the oil meets industry standards like API SN or newer to guarantee quality.
Once you pick the right oil, pour it slowly into the oil filler opening to avoid spills. Using the proper oil keeps your engine running smoothly and extends its life.
Checking for Leaks and Verifying Oil Levels
Before you finish your oil change, you’ll want to check for any leaks and verify the oil level to guarantee everything’s sealed and filled correctly.
Start by inspecting around the drain plug and oil filter for drips or wet spots.
Then, wipe the dipstick clean, reinsert it fully, and pull it out to check the oil level. The oil should sit between the minimum and maximum marks. If it’s low, add oil gradually and recheck.
| Step | What to Look For | Action If Issue Found |
|---|---|---|
| Inspect Drain Plug | Oil drips or wetness | Tighten or reseal plug |
| Check Oil Filter | Oil residue or leaks | Tighten or replace filter |
| Verify Oil Level | Between min and max marks | Add oil if below minimum |
How to Dispose of Used Oil and Filters Safely
Once you’ve confirmed there are no leaks and the oil level is correct, the next step is to handle the used oil and filters responsibly.
Improper disposal harms the environment, so follow these steps to do it right:
- Collect the Used Oil and Filters – Pour the drained oil into a clean, sealed container. Place the used oil filter in a plastic bag to avoid spills.
- Locate a Recycling Center – Find a local auto shop, recycling center, or hazardous waste facility that accepts used oil and filters.
- Drop Off Promptly – Take the oil and filters to the facility as soon as possible to prevent leaks or contamination at home.
Frequently Asked Questions
How Often Should I Change My Oil Based on Driving Conditions?
You should change your oil every 3,000 to 5,000 miles for severe driving, like stop-and-go traffic or extreme temperatures.
For normal conditions, every 5,000 to 7,500 miles usually works fine.
Check your manual!
Can I Switch Between Different Oil Brands or Types?
Yes, you can switch between oil brands as long as they meet your car’s specifications.
Just avoid mixing different oil types, like synthetic and conventional, to keep your engine running smoothly and prevent potential issues.
What Are the Signs My Engine Oil Needs Changing Immediately?
A stitch in time saves nine: if your oil looks dark and gritty, smells burnt, or your engine sounds louder or runs hotter, you need to change the oil immediately to avoid serious damage and costly repairs.
Is Synthetic Oil Better for My Car Than Conventional Oil?
Yes, synthetic oil is better for your car because it offers superior protection, lasts longer, and performs well in extreme temperatures.
It keeps your engine cleaner and can improve fuel efficiency compared to conventional oil.
Can I Change My Oil Myself if My Car Is Still Under Warranty?
Yes, you can change your oil yourself even if your car is under warranty.
Make sure you follow the manufacturer’s guidelines exactly.
Keep all receipts and records to avoid voiding your warranty in case of disputes.
Conclusion
Changing your oil and oil filter is as important as giving your car a fresh breath of life.
By following the steps carefully, you’ll keep your engine running smoothly and extend its lifespan.
Remember to prepare safely, choose the right oil, and dispose of used materials responsibly.
With a little practice, this routine maintenance will become quick and easy, helping your car perform like new every time you hit the road.
In conclusion, changing your oil and oil filter is essential for maintaining your vehicle’s health.