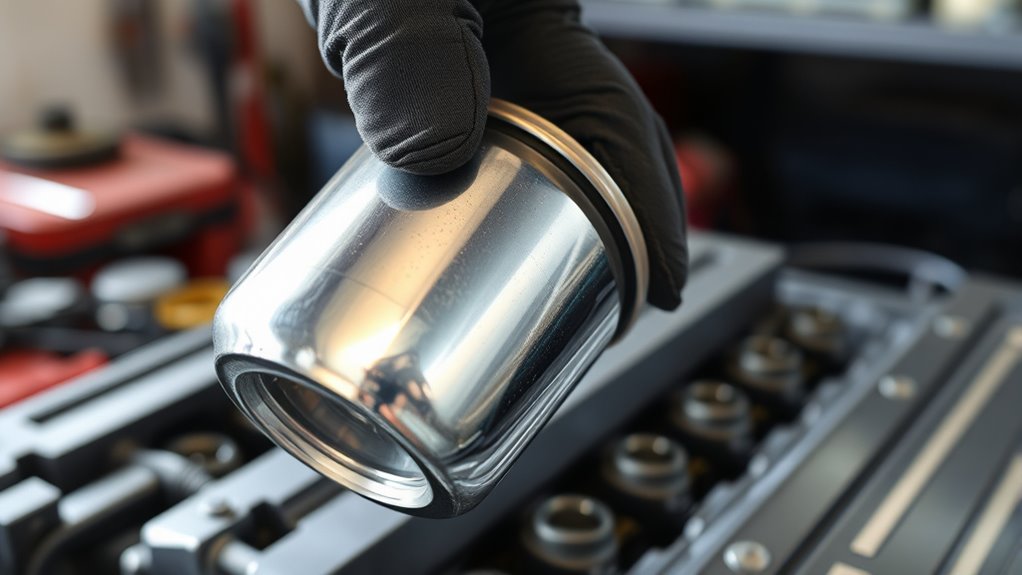
When it comes to how tight an oil filter should be, proper installation is crucial for your engine’s health.
You should hand-tighten your oil filter until the gasket touches the mounting surface, then turn it another 3/4 to 1 full turn for a secure seal.
Avoid using tools or overtightening, as that can damage the gasket, cause leaks, or make removal difficult later.
A snug fit by hand is usually perfect to keep your engine protected.
If you want to guarantee you’re doing it right and avoid common mistakes, there’s more helpful advice to explore.
Key Takeaways
- Hand-tighten the oil filter until the gasket contacts the mounting surface.
- Then tighten an additional 3/4 to 1 full turn by hand for a secure seal.
- Avoid using tools to prevent overtightening and potential damage to the filter or housing.
- A properly tightened filter should feel snug but not forced or excessively tight.
- Check for leaks after installation and engine start to confirm proper tightness.
How Tight Should an Oil Filter Be for a Proper Seal?
Although it might seem simple, tightening your oil filter just right is essential to guarantee a proper seal. When you screw in the filter, start by hand-tightening it until the gasket makes contact with the mounting surface.
After that, turn the filter an additional three-quarters to one full turn by hand. This level of tightness compresses the gasket just enough to create a leak-proof seal without causing damage. You don’t need a wrench at this stage because over-reliance on tools can lead to overtightening.
If the filter feels snug and doesn’t move when you gently try to twist it, you’ve likely achieved the correct tightness. Remember, a properly sealed oil filter keeps your engine oil clean and prevents leaks, protecting your engine’s health.
Why Overtightening Your Oil Filter Causes Problems
If you overtighten your oil filter, you risk damaging the gasket or the filter housing, which can lead to leaks or even engine damage. When you crank down too hard, the gasket can get crushed or torn, preventing a proper seal.
This allows oil to leak out, reducing lubrication and potentially causing engine wear. Over-tightening also makes the filter extremely difficult to remove during your next oil change, increasing the chance of stripping the mounting threads or breaking the filter.
Additionally, excessive force can warp or crack the filter housing, leading to costly repairs. To keep your engine safe and avoid unnecessary damage, you want to tighten the filter just enough to create a secure seal—not so much that you risk these problems.
How to Tighten an Oil Filter Without a Torque Wrench
Wondering how to tighten your oil filter properly without a torque wrench? Start by hand-tightening the filter until the gasket contacts the mounting surface. Then, give it an additional 3/4 to 1 full turn by hand. This method guarantees a secure fit without overtightening.
Here’s a quick guide to help:
| Step | Action | Tip |
|---|---|---|
| 1 | Screw filter by hand | Stop when gasket touches |
| 2 | Tighten 3/4 to 1 turn more | Use fingers, not tools |
| 3 | Check for snug fit | Avoid forcing or tools |
What to Do If Your Oil Filter Is Too Tight or Stuck
After tightening your oil filter by hand, you might find it too tight or stuck when trying to remove it later.
Don’t panic. Start by applying some penetrating oil around the base to loosen any grime. Let it sit for a few minutes.
Then, use an oil filter wrench or a strap wrench to get better grip and leverage. If it still won’t budge, try tapping gently around the filter with a rubber mallet to break the seal.
Avoid using excessive force to prevent damage. In stubborn cases, warming the area slightly with a heat gun can expand the metal and ease removal.
Always turn counterclockwise when removing. If these methods fail, consider asking a professional to avoid damaging your engine or filter mount.
Tips for Properly Installing Your Oil Filter to Avoid Leaks
Although installing an oil filter may seem straightforward, taking a few extra steps can prevent leaks and guarantee a secure fit.
First, lubricate the rubber gasket with fresh oil to ascertain a proper seal. Next, screw the filter on by hand until the gasket contacts the mounting surface. Then tighten it an additional 3/4 turn; avoid using tools to prevent overtightening.
Finally, double-check for leaks after starting the engine.
| Step | Action | Reason |
|---|---|---|
| Lubricate Gasket | Apply fresh oil | Ascertains proper sealing |
| Hand Tighten | Turn until gasket seats | Prevents cross-threading |
| Additional Turn | 3/4 turn by hand | Secures without damage |
Following these tips helps you install your oil filter correctly and avoid leaks.
Frequently Asked Questions
How Often Should I Replace My Oil Filter?
You should replace your oil filter every time you change your oil, usually every 3,000 to 7,500 miles depending on your car and oil type.
Check your owner’s manual for the best schedule.
What Type of Oil Filter Is Best for My Car?
Picture a shield guarding your engine. Choose a high-quality synthetic oil filter for best protection.
It traps tiny particles better, lasts longer, and matches your car’s specifications. Always check your owner’s manual for guidance.
Can I Reuse an Oil Filter After Removal?
You shouldn’t reuse an oil filter after removal because it can’t properly seal or filter contaminants anymore.
Always replace it with a new one to guarantee your engine stays protected and runs smoothly.
How Do I Dispose of Used Oil Filters Safely?
You should drain used oil filters completely. Place them in a sealed container and take them to a recycling center or hazardous waste facility.
Don’t toss them in regular trash; protect the environment and follow local regulations.
What Are Signs of a Failing Oil Filter?
You’ll notice engine performance drops, oil pressure warning lights, or unusual noises if your oil filter’s failing.
Dark, dirty oil or leaks around the filter also signal it’s time to replace it promptly.
Conclusion
When tightening your oil filter, trust the technique: turn it till it’s snug, then give it a gentle twist.
Too tight troubles threads and makes removal a real mess, while too loose lets leaks lurk.
Without a torque wrench, rely on feel and finesse.
Remember, proper placement prevents problems, protecting your engine’s performance.
So, stay steady, stay smart, and secure your filter with care to keep your ride running right and ready!
In conclusion, it’s important to know how tight an oil filter should be.